Creality, makers of the Ender series of 3D printers, have released a product called Wi-Fi Box meant to control printers over a network and I ordered one for today’s teardown. Let’s get something very clear from the start. If you’re looking to control your 3D printer over the network, get yourself a Raspberry Pi and install Gina Häußge’s phenomenal OctoPrint on it. Despite what Creality might want you to believe, their “Wi-Fi Box” is little more than a poor imitation of this incredible open source project. Even if you manage to get it working with your printer, which judging by early indications is a pretty big if, it won’t give you anywhere near the same experience. At best it’ll save you a few dollars compared to going the DIY route, but at the cost of missing out on the vibrant community of plugin developers that have helped establish OctoPrint as the defacto remote 3D printing solution.
That being said, the hardware itself seems pretty interesting. For just $20 USD you get a palm-sized Linux computer with WiFi, Ethernet, a micro SD slot, and a pair of USB ports; all wrapped up in a fairly rugged enclosure. There’s no video output, but that will hardly scare off the veteran penguin wrangler. Tucked in a corner and sipping down only a few watts, one can imagine plenty of tasks this little gadget would be well suited to. Perhaps it could act as a small MQTT broker for all your smart home devices, or a low-power remote weather station. The possibilities are nearly limitless, assuming we can get into the thing anyway.
So what’s inside the Creality Wi-Fi Box, and how hard will it be to bend it to our will? Let’s take one apart and find out.
Surprisingly Elegant
It probably won’t come as a huge surprise given the low purchase price, but there’s not a whole lot to the Wi-Fi Box. Creality wanted to produce this product as cheaply as possible, and it shows. The package doesn’t even include a power supply or the required micro SD card, though oddly enough they did pack in two USB cables. It seems clear that the company didn’t want to invest more than was necessary into what’s ultimately an experimental product. Some users have even reported receiving a Wi-Fi Box for free when purchasing a 3D printer from Creality; with that kind of business model, cost reduction is certainly the name of the game.
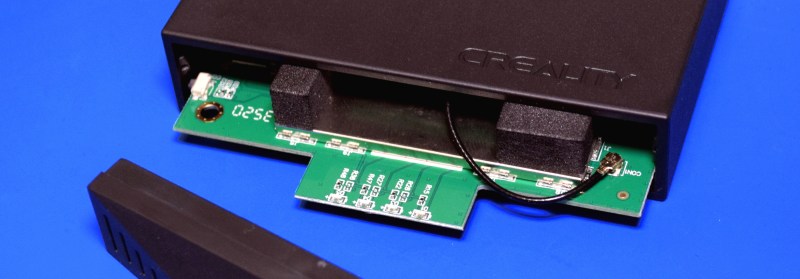
Even so, the device itself doesn’t feel cheap. In fact, quite the opposite. The plastic enclosure is surprisingly thick and rigid, and feels more like the injection molded case for a power tool. It’s probably overkill for a little blinking box that will live an easy life perched next to a 3D printer, but I’m certainly not complaining. It’s also interesting to note that the case is one solid piece of plastic, and not a clamshell. To remove the PCB, you have to pry off the front panel and slide it out.
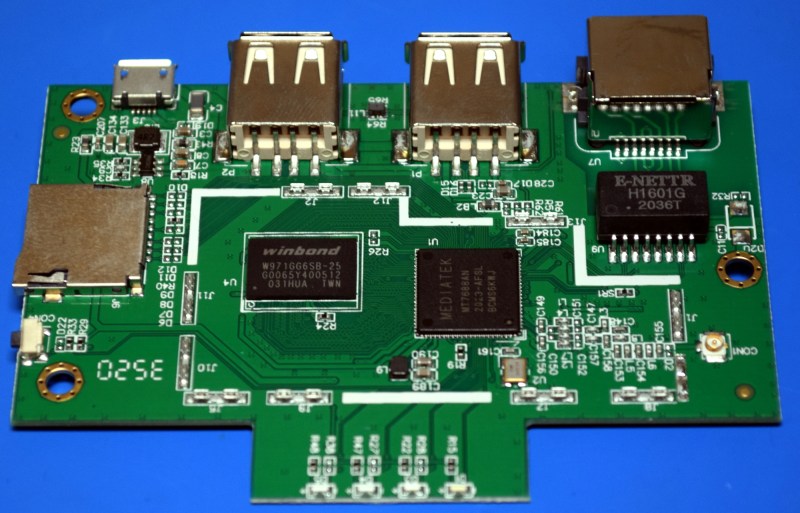
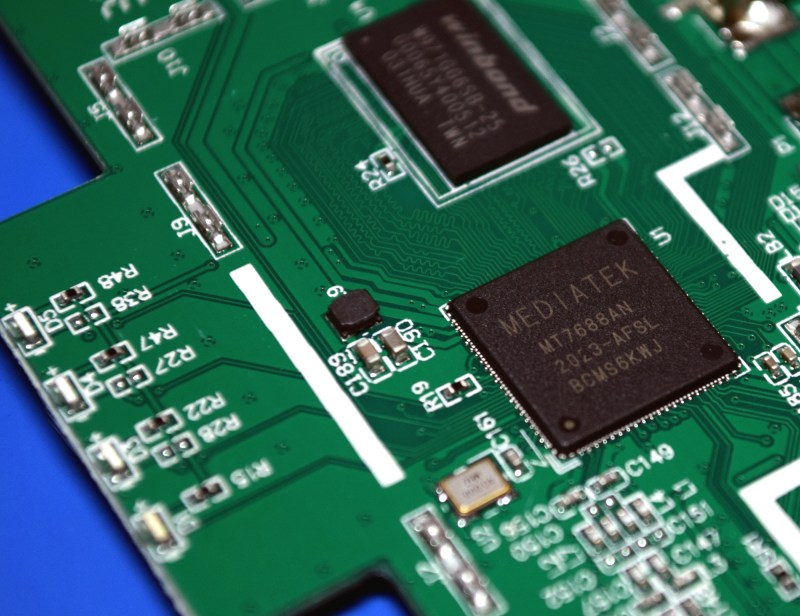
With the board out of the case and the metal RF shields removed, we can see just how little it takes to get the Creality Wi-Fi Box going. The MediaTek MT7688AN SoC features a 580 MHz MIPS CPU as well as integrated controllers for USB, SD, Ethernet, and WiFi, while the Winbond W971GG6SB provides 128 MB of DDR2 SDRAM. The SoC also has a few GPIO pins, which we can clearly see have been broken out to the four status LEDs on the front of the board. Add in magnetics for the Ethernet port and some filtering on the micro USB power supply, and you’ve got yourself a fairly capable Linux system in a compact, energy efficient, and cost effective platform.
Of course, it’s not exactly a speed demon. Even the Raspberry Pi Zero could run circles around this little box. Which ultimately is our first clue as to why Creality didn’t use a customized version of OctoPrint for this product. Hardware that can run it effectively is simply too expensive; to hit their desired price point, they had to come up with their own simplified take on the concept.
Digging In
So at this point we know it’s a 580 MHz Linux box with 128 MB of RAM. Not terribly exciting in 2020, but not exactly a paperweight either. But of course it doesn’t matter how powerful the hardware is if we can’t get access to the OS. The next step is figuring out how badly Creality want to keep us out.
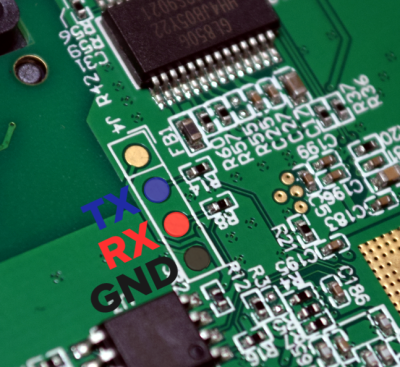 Our first break comes from the fairly conspicuous serial port header on the bottom of the PCB. After hooking up a USB-to-serial adapter and stumbling upon the correct speed of 57,600 baud, we can see the U-Boot and Linux kernel messages go by, and eventually we find ourselves at a login prompt. Unfortunately, we don’t know the password.
Now anyone who’s familiar with embedded Linux hacking knows this is where you bring out the modified U-boot environment variables to start the system in single user mode. But try as I might, I could never get into the U-Boot command line. After a solid 30 or 40 attempts to interrupt the bootloader before it loads the kernel, I’ve come to the conclusion that either my timing is exceptionally poor or access to U-Boot has been disabled.
Where does that leave us? Well, right next to the serial port you’ll find the 16 MB Boyamicro 25Q128 SPI flash chip that holds the firmware. You could pull the chip, read its contents, modify the filesystem, and flash it back. If you plan on doing a lot of firmware fiddling, you could even install a socket for the chip to keep the good times rolling.
Luckily, there’s an easier way in. A peek into an official firmware update file from Creality shows the gadget will look for an install.sh Bash script on the micro SD card and run it during startup. Any commands we put into this file will be executed as root, which allows us to easily change the password without breaking out the soldering iron:
#!/bin/sh
echo 'root:hacked' > /tmp/pass
cat /tmp/pass | chpasswd
With this file on the SD card, we’re now able to log into the root account over the serial port and start exploring.
It’s a Router, Jim
When I first heard about this device, I had high hopes that it might actually be running OpenWRT. Unfortunately, what we actually have is a very minimal BusyBox environment that was clearly designed for a wireless router. I know this because it seems all of the router functionality is still intact, it’s just been commented out wherever necessary to keep it from being visible in the web interface or starting automatically.
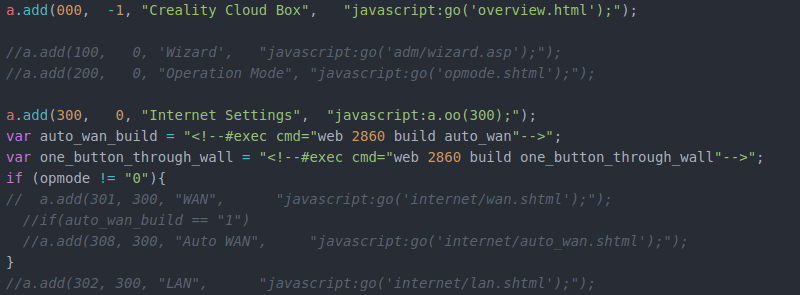
Similarly there are many programs and scripts on the system that are totally unnecessary for controlling a 3D printer. From emulating an iTunes server and streaming MP3s to negotiating with 3G modems, the Creality Wi-Fi Box has plenty of hidden features that are locked behind an intentionally limited web interface.
Software Freedom
In summary, we’ve got a fairly well documented SoC, a functioning serial port, an official firmware update file to study, and an easy way to get root access. There’s even an existing MT7688 subtarget for OpenWRT. All the pieces are here, they just need to be put together.
Luckily, we aren’t the ones that have to do it. A developer by the name of George Brooke, AKA [figgyc], has already done the work for us. Even before I was able to finish writing this post about the hardware, he’d identified and fixed a few issues (such as adding support for that Boyamicro 25Q128 flash chip) that were preventing OpenWRT from booting on this board. Utilizing the stock firmware update mechanism, you can install his fork of the popular embedded Linux distribution on the Creality Wi-Fi Box without making any hardware modifications. He hasn’t figured out how to go back to the stock firmware yet, but frankly, who cares?
With OpenWRT installed, the Creality Wi-Fi Box becomes a true general-purpose computer. Thanks to a vast array of packages and an active development community, this simple firmware swap turns a $20 gimmick into a useful tool.
Escaping the Walled Garden
After spending some quality time with the Creality Wi-Fi Box, I can’t help but be reminded of the Recon Sentinel we took a look at a few months back. Both Linux-based devices offer us an easily reusable hardware platform, as little to no attempt was made to limit the user’s ability to install more capable software on them. Even if it’s more likely attributed to happenstance than any genuinely altruistic goals on the part of the developers, we should be so lucky to have more commercial devices that can be easily modified by the end user.
But I wonder if the similarities might ultimately go a bit deeper. The Sentinel was designed to lock the consumer into an expensive service contract, thereby generating far more revenue than the sticker price of the gadget itself did. Could Creality be planning something similar with the Wi-Fi Box? Admittedly we haven’t seen any indication of that yet, but it stands to reason that you don’t give away hardware at or below cost unless you’ve got a plan to make that money back in the future.
A clue may be found in the product announcement for the Wi-Fi Box. It describes the “Creality Cloud”, a service that “offers an energetic and creative community where users can download unlimited STL files for free, share their models, and the most important feature, online slice & print”. While the models offered on the service are free now, it’s not hard to imagine that paid models could be introduced down the line. By using the Wi-Fi Box, Creality may hope customers become dependent on their unique software ecosystem. This could allow the company to create a monetized 3D model repository, something their rivals in the marketplace have thus far largely failed to accomplish. Only time will tell.
In the meantime, any hacker or maker looking for a new project would do well to pick up one of these cheap devices. Just make sure to immediately replace its proprietary firmware with an open source alternative that puts you back in control of the hardware you paid for.
No comments:
Post a Comment